Thursday, 10 December 2009

Week 12 – Reflection and Thoughts

Overall, I have enjoyed working through this module. Although the workload has been quite intense, the module has been very interesting. 3D modelling is not one of my strong points and probably not something I will be continuing very much with. However, it has been great learning new skills about 3D modelling, animating the models and learning the piece of software itself.

I feel that the group worked well together and we managed to split the workload up into manageable sections that each group member could work on. As I did not feel I would be able to complete as much of the modelling as the other group members, I only took a small proportion of the modelling and worked mainly on the audio and post-production parts of the project. Our group managed to work well to the timeframe that was laid out during the first week of the project with only minor changes when certain bits took a little longer than anticipated.

The parts that I modelled for the group went well and I managed to produce all the parts allocated. I did struggle with a couple of parts but was able to ask fellow group members who were able to point me in the right direction.

Finally, I think our overall product we created as a group has worked well and has met expectations we had in the first few weeks. The animation does what it is meant to and shows the engine

Week 12 – Presentation

During the final week of the module, a presentation will be given to the clients, volunteers from the Museum of Power. The presentation will show the clients which model our group chose to create, how we went about researching and planning the animation and then finally how the model was modelled, animated and put into a video.

The presentation is split into four sections so each group member is able to talk about one thing. As I had mainly worked on the post-production parts of the animation, this is the part I will talk about. This includes rendering, video editing, adding text info and audio editing.

Thursday, 3 December 2009

Week 11 – Rendering and Video Production

The last stage to create the animation was to render the 3D Studio Max file into video files. If this was done by one group member in one go, it would have taken a few days to render. To cut this down, we split the rendering up between the group members. One group member took the environment part of the animation to render and the other part with the engine rotating was split up into 3 sections between the other 3 group members.

After all the sections had been rendered, it was my task to create the final video. To begin with I collected all of the rendered video files from the other group members. I then used Adobe Premiere Pro to place all of the renders onto a timeline that matched our original storyboard. Once I had all of the video files in place, I started to add in the text facts. As the machine was so unusual and almost unique, it was hard to find information and facts about the engine and its use, so the research for these facts was taken from information found at the Museum of Power. Most of the text facts are displayed whilst the engine is rotating in the animation.

The audio that I edited during the previous week was then added into the timeline to add to the video. We decided, as a group, not to include narration in the final video as the noisy environment of the Museum of Power would make it hard for anyone trying to listen.

Finally, the timeline was rendered out to a Windows AVI file and also a QuickTime MOV file.


Thursday, 26 November 2009

Week 10 – Sound Research and Editing

One of my tasks allocated for this project was to provide all of the sound effects used for the final animation. We decided that we wanted a mixture of sounds from the environment and sound of the engine itself.

To start with, I took a look at the environment that had been modelled for the animation and started looking for sound effects that would match the scene. I used the sound of water rippling, a water wheel turning and some general ambience sounds of birds, wind and trees to create the sound effects required for this part of the video. For the engine itself, I used audio of the actual machine running from the video that I took at the Museum of Power when we visited a couple of weeks ago. I also added this to the beginning environment scene and mixed it quietly with the rest of the audio to make it sound muffled as it was inside the dredger on the lake.

Thursday, 19 November 2009

Week 9 – Creating the Handle

To create the wheel and handle, I started by drawing a helix with plenty of turns for the thread and making sure that the radius were the same. I then added an extrude modifier and changed the amount until the extruded part just touched the next coil. I then added a normals modifier to turn the thread the right way round as it was currently inside out.

I then used a Vertex Weld modifier to weld the gap between each coil together. I adjusted the amount just enough so the gap disappeared. I then went to Editable Poly and chose Edge mode. Selecting one edge down the length of the object, I pressed the Ring button to select the entire helix. I then clicked the connect button and gave the selection 1 segment. This now created another helix travelling the length of the object.

To set the thread depth, I selected one edge of the spiral and clicked the Loop tool to select one spiral. I then used the scale tool to decrease this spiral which would then adjust how deep the thread was. I then scaled the whole helix down the length to adjust how close the thread was.

To create the wheel on the end, I drew a Torus shape for the outline of the wheel. I then added a thin cylinder in the middle and joined that to the outside with small boxes. This then created the main wheel shape.

To create the wooden handle, I drew out a spline line for the outside shape and then used the lathe modifier to create the entire handle. It took a couple of attempts to get this right, but eventually, I had a shape I was happy with.

Finally, I placed this handle onto the wheel and then placed both onto the thread I created earlier. I added a long cylinder to the end of the thread to create the connecting rod.


Week 9 – Modelling Side and Handle

Before I started modelling the side part I had been allocated, I decided to draw out the part onto paper so I could clearly see what I was modelling. Using the reference photos and video taken, I was able to create a drawing I could work from which was easier to use than lots of photos.

I started by using a spline to draw out the shape of the metal side, following my drawing I had done earlier. I experimented with the different initial and drag types for the corners to get them as smooth as possible and to match the model as best they could.

When I had the shape drawn out in 3D Studio Max, I converted the spline to an editable poly. I then used the extrude tool to make the shape 3D and give it some depth.

To create the tapered metal strip, I simply created a long, thin box which I converted to editable poly. I then went into vertex mode and moved the bottom vertexes out to create the taper effect.

I then used more thin boxes to create the angle-iron sections of the side plate. I rotated one piece 90 degrees to connect to the other to create the right angle piece. I then went into vertex mode to move some of the vertexes at the end to create the sloping metal end.


Spheres were used to create some of the bolt heads seen on the model. These were placed half in, half out on the model so only half of the sphere was actually on show. This looked quite effective and worked well as a pan head bolt. For the other hexagonal bolt heads I used a Gengon (found in extended primitives). These were then positioned onto the model to work, like the spheres, as bolt heads. To create the nuts seen on some of the bolts, I used another Gengon but created a hole through the middle with a cylinder and the Boolean tool. An OilTank was then added inside the Gengon to look like the end of the bolt.


The bottom of the lever was created by using a box for the metal plate and two cylinders placed on top of each other to represent the spacers on the model. Four small spheres were used as bolt heads in each corner of the small metal plate.

I created the lever itself by drawing a long, thin box into the front viewport. I then drew a cylinder that had the same diameter as the width of the box. Entering editable poly and polygon mode, I selected and removed half of the polygons of the cylinder so I was left with a half cylinder. I then attached this to the box to create the main part of the lever.

A chamfer box was used a little way up the lever as a connecting spacer. I used polygon mode to select and remove more polygons to create the straight edges. I then used the Cap edges tool to cover up the holes I had made by removing polygons.


A small box, to show the locking mechanism, was placed a small way further up the lever. Four small gengons were used as bolt heads in each corner on the front face. I then drew a cylinder handle for the top of the lever.

To create the locking handle of the lever, I drew out another box and added 4 segments in each axis. This enabled me, when converting the box to editable poly, to select and remove polygons in the middle of the box. This was to allow the part to fit around the lever. I used the cap tool to cover any holes I had made. This was then placed onto the lever and two cylinders were used to represent the pins holding the lever in.

I then drew a final long, thin box to use as the connecting rod between the locking handle and locking mechanism a bit further down the lever.


The rack section of the lever was created by first drawing out a box into the front viewport. I then made sure that the box had plenty of width segments and chose 53 as the final number. After converting to editable poly and selecting polygon mode, I selected alternate polygons along the top of the rack box and then extruded them down to create the rack model. When I was happy with the looks of this, I then created a cylinder with the same diameter as the height of the box, cut the cylinder in two and placed at either ends to create the rounded ends. These were attached to create one object. I then applied a curve modifier in the x-axis of 58 degrees and 90 degrees direction to create a realistic rack.

This was then placed just under the locking mechanism of the lever and duplicated either side. Two cylinders were used as connecting bolts and two gengons and OilTanks were used for the bolt heads.


A connecting rod was created by drawing out a long, horizontal, thin box and then just extruding the end to create the staggered effect. This was then joined on to the raised chamfer box created earlier on the lever.

Finally, I drew out small cylinders, placed them through the metal side and used the Boolean tool to create the holes.

Thursday, 12 November 2009

Week 7 - Job Allocation and Beginning to model

As I didn’t feel I would be able to model quite as much as some of the other group members, I chose to model a small section and then mainly focus on the post production audio and video editing. The parts I chose to model were the base that the whole engine sat on and a side plate with lever and handle.

To create the base I started by creating a chamfer box in the top viewport. I then changed the fillet size until I had a good representation of the curve on the base of the engine. I then converted the chamfer box to an editable poly. Using polygon mode, I then selected the polygons on two opposite ends and deleted them to create straight, rather than curved, ends.

I then created a cylinder in the top viewport and used the scale tool to change one axis so the cylinder became oval. I then duplicated this and placed the two cylinders through the chamfer box and used the Boolean tool to remove these from the base. This then created two recesses where parts of the engine rotated into.

Next, I selected polygons on the underside of the chamfer box and removed them to get rid of the bottom half of the curve. I used the cap tool to create a cap over the parts I had removed. I then drew a thin box, the same size as the base, for the chamfer box to sit on. I then converted the box to an editable poly and attached it to the chamfer box to create one object.

I removed polygons on one end to create a recess where the main body of the engine sat. I placed small cylinders around the edge of the base and used the Boolean tool again to remove these cylinders to create holes for fixing points on the base.

Finally, I added two boxes near the back of the model for part of the engine to sit on and also created four triangles for supports on the bottom of the base.


Wednesday, 4 November 2009

Week 6 - Starting the Group Project

Having spent the last 5 weeks working individually on modelling our own heads, the next 6 weeks will be devoted to group work. We will be constructing a model of a steam engine from the Museum of Power in Langford, Maldon.

As a group, we visited the Museum in Week 3 and chose one of the engines in the exhibition. The next stage was to present the idea to the rest of the class and lecturer for approval. A short PowerPoint presentation was shown, highlighting which engine we had chosen to model, what it was originally used for and how the team was to be divided up and work on each part. The presentation was received rather well with positive comments and a couple of suggestions. We were also advised to ensure we knew what measurement we were working in. One suggestion was to include a character in the animation but we decided against this as a group as we felt it may be too much work to complete in such a short space of time.

With our project approved, we set off for our first team meeting to decide our plan of action for the following six weeks!

Friday, 23 October 2009

A Slightly Disappointing End

Although I was quite pleased with what I had modelled in 3D Studio Max, I was a bit disappointed that I ran out of time to try any materials out. I also didn’t get chance to create the ears on my model. I always knew when I started this part of the assignment that it was going to be difficult and time consuming, and I didn’t expect to get too far in the 4 weeks that we had effectively.


Not being very confident with 3D Studio Max, and finding the concept of 3D modelling quite challenging, I was able to complete the tutorial videos up to Part 8. I learned quite a few new techniques with 3DS Max along the way which should become useful when I start the next part of this assignment for this module.

I did run into several problems along the way which I think are partly to blame as to why I only managed to complete what I did. I spent quite a long time with the Topology of my face which was important for the module. It took three attempts to get this right and even then there were still a couple of errors. Once I was into 3DS Max and starting to model, I managed to work ok for a while until I started extruding the splines to create the 3D element, where I found a few more problems with my mesh. I had not correctly drawn in some of the lines and ended up with overlapping lines. These took a while to work out how to solve the problem and actually sort them out. By this time, there was only about a week to go until the hand in date and I was getting worried about how much I would be able to actually complete. However, I still carried on and was able to complete the rest of the head, minus the ears.


The main problem I was up against, as was the same with some other assignments, is time and my time management. I tried to keep on top of the workload, spreading it out equally across the 4 weeks, but due to some other problems mentioned above, I wasn’t able to stick to this schedule as much as I would have liked. Then, not being able to find additional time to work on the model, time ticked away!

If I get time, I am intending to carry on with the model in my own time, even though the hand in date has passed, working through the tutorial videos as I feel the skills I can learn will be helpful to me for the rest of the module. I would like to have a go at creating the ear and then the materials and maps required to put the actual texture onto the 3D model.

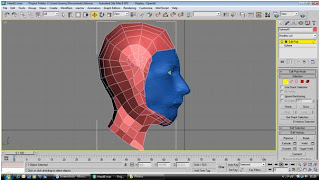
Overall, although I haven’t managed to complete the model as far as some of my fellow classmates, I am quite pleased with how much I have personally achieved. When looking at the module in the first week, I thought there was no way I was going to be able to complete this module at all! I have managed to pick up some new skills with 3D studio max which I am also pleased about, and now I look forward to the second part of this assignment.


Thursday, 22 October 2009

Neck and Side

To create the rest of the head and neck, I went into edge mode and dragged out the edges from the sphere to continue down the back of the head to the neck. Using the topology I had drawn on in Photoshop as guidelines, I was able to create the required quads for this section. I then started to fill in the centre around the ear area. I worked in circles creating quads by pulling out edges and drawing in any that were needed. When all of the quads were drawn in, I started to move the individual vertexes around using the move tool until they were spaced out correctly.


I then set about extruding the lines out to the side to match the front image. This was quite tricking and in the end was easier when I hid the reference plates as they just seemed to get in the way. I used the soft selection tool to pull the side of the head out in a realistic manner. This worked quite well and I was able to tweak individual vertexes afterwards when turning the Soft Selection off. The area under the chin was also tricky working out exactly where each point had to go. After a bit of trial and error, I managed to get the basic shape setup.


I still had a gap under the chin but I left that for the moment. I then set about connecting the vertexes of the sphere to the front face. I used the Snap to Vertex tool to help with this. I then selected the face and in the modify panel, selected Attach. I then chose the back of the head to attach. This then connected the two pieces of the model together to form one single model. I then selected all of the vertexes and chose the Weld button in the modify panel to connect all the vertexes together so I could continue modelling.


With the two pieces connected, I then started to move vertexes around again in perspective view to get the join right between them. I turned on the turbosmooth to see the end result. I then kept tweaking vertexes until I had a smooth mesh. Unfortunately there were a couple of triangles near the bottom of the face which did result in a slight pinching effect but it was not really obvious.


I then continued to model underneath the chin, extruding lines to create the polygons that I needed to finish the neck. Once I had these created I spent some time moving them into position to create the remainder of the neck.


To start with, the head looked a bit too tall; this was because I had based the sphere around the top of my head, forgetting about my hair on top. To resolve this, I selected all the vertexes on the top of the head and moved them down into the head until they were at the correct height. I then adjusted the other vertexes on the side of the head that were now out of place.


Finally, I had a model of my head that, although didn’t look exactly like me, did have some resembling features!

Back of the Head

As I had spent a lot of time on the previous sections of the head, I was quickly running out of time for this part of the assignment. With less than a week to go, I was only moving onto the back of the head. However, I started modelling to see how far I could get.

The first stage was back in Photoshop with the reference images. On the profile image I drew on more topology, cutting up the image into quads again. This was a little easier than the front image topology as it was nowhere near as complex. I managed to create the guidelines quite easily.

Back in 3DS Max, I reassigned the Photoshop file to the Material map and the reference planes updated themselves automatically. I now had the side topology viewable on the reference planes.

To make drawing all the segments around the back of the head easier, I started by drawing in a sphere to model as the head. I made sure the poles of the sphere were pointing out of the side of the head, and then scaled the sphere slightly to fit the shape of the head better. I then adjusted the number of segments on the head so that there were a similar amount of lines to the top of the face. I lined up the centre line with the centre line of the face.


I then set about removing unwanted segments from the sphere. To start with, in Polygon mode, I set the Paint Selection Marquee, then in the left viewport, holding the Ctrl key, I painted over the unwanted segments in the middle of the sphere and all the ones underneath the surface of the face. I then pressed the delete key and this left me with the back and top of the head which I could then model.

However, as the model was mirrored, I first needed to remove all the segments on the right hand side. To do this, I set the selection back to Rectangular selection and then highlighted all of the segments on the right hand side of the sphere and deleted them. The symmetry modifier would recreate the right hand side for me later.


I then had to attach the vertexes on the sphere to the ones at the top of the head. To do this I turned on the Snap to Vertex mode and then moved the first two from the centre into position. I then moved the vertex furthest on the left using the soft selection tool to ensure the side of the head moved smoothly and more realistic. When I had done this, I turned the Soft Selection tool back off and moved the remaining vertexes into position.

I then removed some of the segments of the sphere as it did not need to be so complex. To do this, I selected edge mode in the modify panel and then selected every other edge around the side of the sphere in the left hand viewport. I then used the Ring tool to select all of the edges parallel to the ones selected. I then clicked the Collapse button in the modify panel and they unselected segments moved to create a simpler shape.

The next stage was to create the back of the neck and side of the head.

Some Extra Detail

To add some more detail to my model, I started with the nostrils. Currently, they were just two holes in the mesh and these needed refining to represent my nostrils properly. First, in the front viewport, I used edge mode to select all the edges around the nostril. Then, while holding down the shift key to clone, I dragged the edges out to create another set of polygons around the nostril. I made sure the end set of polygons connected with each other and the side of the nostril and then welded the vertexes. I then moved them around a little to space them out ready for refining.

To make it easier to model, I split the polygons up into two. First, I selected all the horizontal edges in the new set of polygons. Then, in the modify panel, I used the connect tool to connect all of these edges with a new line, splitting the polygons in two. At the end, a five sided polygon was created by this process. Therefore, I used the create tool in the modify panel to draw in some more polygons and get rid of the five sides.

The end result was not quite like the one shown in the tutorial with perfectly flowing quads all around the nostrils and onto the mirrored surface; however I was happy with what I had created.
Rather than having a hole in the mesh for the nasal passage, I created two new polygons in the space. I then extruded these back inside the head a little way so they actually looked like nostrils and the nasal passage that led back into the head.

The next stage was to remodel these new polygons by moving vertexes around as when I went into the perspective view, the nose did not look realistic as there were loads of new vertexes all around the nose. I spent quite a while trying to get the vertexes in the right place as there was no real guide as to where to place them. As suggested in the tutorial, I tried setting the surface to semi transparent to look at the reference images behind but it was quite complex around that area with a lot of vertexes and edges making it very difficult to see the image so it wasn’t actually much help. After a lot of tweaking around, I eventually got the vertexes into more or less the right position.

The next part of adding more detail was the lips. I used the same method as I did with the nostrils by dragging out more polygons, connecting the horizontal edges to split them into two and then moving the vertexes around until they were in the correct location. This proved easier than the nose to do as the lips are not as complex. I did not quite get them how I would have liked, or how they looked in the tutorial, but I think they were good enough for what I felt I could achieve.

I also created more polygons and moved vertexes around in the eye area. I did not spend quite as much time on this as I would have liked as I was conscious that I was running out of time to try to get as much of the head done as possible. I created more polygons around the edge of the eyelid and then pushed some of the vertexes around the top of the eyelid back into the head. This worked quite well and I managed to get a good effect around the eye.


I turned on the TurboSmooth modifier to look at the changes I had made and I was quite impressed with what I had achieved. There were one or two odd vertexes pointing out at funny angles so I turned off the turbosmooth and readjusted the offending vertexes until I had a nice, smooth surface.

The next stage of the model was to start creating the back of my head.

The Other Side

The next step was to create the other side of my face. Rather than defining and creating the topology again for the other side, the symmetry modifier was used to create an exact copy on the other side. The left hand side was mirrored along its X-axis and flipped to create the right hand side of my face. To start with, this didn’t look quite right as the two halves of the face overlapped a little so there was an odd line down the middle. To rectify this, I selected the Mirror section of the Symmetry modifier and then used the move tool to line the right hand side up to the left hand side. I adjusted them so they were just touching down the centre. This looked much better.
 After this, I looked at any lines of the topology that created straight lines, points and corners and smoothed them out by moving vertexes to create smoother lines that flowed across the face better. When this was done, I used the NURMS subdivision to view a smoother surface. This highlighted some areas that still needed tweaking as there were a couple of sharp points and also a couple of visible lines.


At this point, I also noticed two areas where there were triangle polygons and had not attached properly to the rest of the mesh. It was important that these were sorted; otherwise this would cause even more problems later on. I turned off the NURMS subdivision and selected Edge in the modify panel and removed a couple of edges and then created new edges, creating all quads and no triangles. When I was happy that these had all been sorted, I welded the vertexes together so I was able to carry on with my modelling.


I spent quite a bit of time working on the nose and eye areas as they still didn’t look right. The nose looked to thin and pointy and the corners of the eyes protruded more than they should. I worked first in the front viewport, moving some vertexes around to allow me to adjust the nose better in the side view. I then worked in the side view moving the vertexes on the nose to try to create a better representation. I kept the perspective viewport open so it was clear what each of my vertex moves was doing to the overall model. I then also moved a lot of the vertexes around the eye back into the model a little bit and a bit further for the ones at the corners of the eye. Eventually I got the look I was after and I was quite happy with the result.

Tuesday, 20 October 2009

Starting the Modelling Process

Now the reference images and planes were all set up in 3D Studio Max, I was ready to start modelling. Spline modelling was the method being used to create the 3d image. To start, I selected the Line tool in the Create Spline panel and started tracing over the quads I had drawn on the front image in Photoshop. I enabled the Snap to Vertex setting so it would be easier to re-create the quads and ensure there were no gaps.

I managed to finish this fairly quickly and finally had a full half face of quads all drawn in on 3D Studio Max. I then selected one of the quads and converted it to editable poly. I then attached all the other splines by going to the modify panel and clicking the Attach button. This then created the mesh for the face. I switched on Edged Faces for the viewport and was able to see all the quads clearly.
As the quads were still all separate, they needed to be fixed together before any further modelling could take place. This was done by selecting all of the vertexes and selecting the Weld option. This then bonded all of the quads together. Finally, I used the ‘Make Planar’ tool in the modify panel to align all the vertexes down the vertical centre. This would help later when mirroring the model.


The next step was to pull the vertexes forwards, using the side image as the reference to create the third dimension of the face. To start with, all the vertexes down the centre vertical were selected. I then used the move tool and in the Left viewport, pulled the vertexes out to meet the front of the image. I then took each individual vertex and lined it up with the edge of my face.


The first few vertexes were quite easy to place along the face. However, when starting to work inwards, it became more and more difficult to work out exactly where to place the vertexes. I soon started placing the vertexes on and it became slightly easier when working round the features of the face. I spent quite some time tweaking the position of the vertexes getting them where I thought was the right position.


The eye was a difficult part to pull out as many of the vertexes overlapped and made it difficult to work out where exactly to place them. I did get them placed in more or less the right position, which could be tweaked later.


I finally had half a mask of a face which looked ok for my first attempt. I spent more time tweaking vertexes trying to get them in the best position.

The next stage is to mirror the face and get the other half positioned.


Into 3D Studio Max

The first stage in 3D Studio Max was to set up the reference plates to hold the images. This was done by drawing a plane into the viewport. A material was then created to hold the Photoshop file I had just created. When the material was placed onto the plane, the image didn’t fit exactly so a map modifier was used to adjust this. I used Bitmap fit to adjust the proportions of the image so it was no longer squashed onto the plane. I then adjusted the position of the image on the plane with the modifier so that the front image fitted centrally onto the plane.
To create the profile view plane, the first plane was cloned and then rotated 90 degrees so it was in the correct position. I then used the modifier again to adjust the image on the plane so that the profile image was on show. I had to flip the image to get the correct direction for the image.

To finish sorting out the reference planes, they needed to be frozen so when modelling, they were not accidently moved or changed in any way. The reference plates were all set and ready to start modelling!

Topology

The first thing I needed to do to start my 3d model of my head, was to take two pictures of my head to act as reference plates. These were a front view and a profile/side view. These were taken against a plain white background to make it easier to see when modelling. It was also important to ensure the photos lined up. My ear and nose were used as guides with markers to ensure both angles lined up.


The pictures were then imported into Photoshop where they needed to be aligned. First, any distortion caused by the lens of the camera needed to be removed. Photoshop has a small utility called Lens Correction. In this window, I was able to adjust for any lens distortion and also adjust for any horizontal and vertical perspective problems. To ensure the image was straight, a tool in the Lens Correction window, allows you to draw a line between two points you know to be straight and the tool will then line the image up for you. I used this tool to draw a line between the bottoms of my ears. I also then drew another line, using the centre of my eyes as a reference. This then adjusted my image accordingly so it was straight.


The next step was to do the same with the profile image, again adjusting for any lens distortion, perspective and finally ensuring the image was straight.

When both images were all adjusted, the profile image was copied into the front image, which had an expanded canvas size to accommodate the profile picture. Then, the two images needed lining up with each other. To do this, the image was adjusted to 50% opacity and placed with the corner of the eye lining up on each image. Using the Free Transform tool, the profile picture was then rotated and re-sized so it matched points on the front image. The rotate anchor of the free transform tool was placed at the corner of the eye on both images and then the whole image rotated and pivoted around that point allowing the two images to be lined up even easier.

Overall, I managed to get most of the image lined up successfully. However, my nose didn’t quite line up and overlapped a little, although this was to be expected as no-one’s face is perfectly symmetrical.

When the images were lined up, the opacity was set back to 100% and the profile image moved to the right hand side so it didn’t come into contact with the front image. To check that the two images were lined up correctly, some ruler lines were drawn across to check to see that all the features lined up. I drew lines through the eyes, the nose, the mouth, under the ears and under the nostrils. My images lined up very well which would help when moving onto the modelling stage.


After the images were all lined up correctly, I had to start marking on the front image my topology. This started with drawing on the main protrusions and indents as shown on the tutorial. However, this did take me a while as it was not as obvious as to where all the lines needed to go as on the tutorial. I eventually managed to get the first lines drawn on the face successfully.


When the main lines were drawn on, more detailed lines, splitting the face into quads were needed. For this I used a different colour brush and started by drawing over the first lines. I then started working my way around the eye drawing in quads. I slowly worked my way out until I had completed most of the face. However, I did not find this easy and soon saw many mistakes with 5 sided and 3 sided shapes. I started trying to tweak the lines but soon thought it would be easier to start again.

I created a new layer in Photoshop and started my second attempt. I soon ran into the same problems as I did the first time round, missing out the important diamond shape on the cheek bone and creating a few 3 sided and 5 sided shapes.

To try to make this easier, I printed out my image quite large and started to just study the image and draw on the lines by hand. I found this much easier and fairly soon I had a completed topology on paper. All that was left to do with this was to transfer it onto the Photoshop file. To help with this, I used a graphics tablet which worked a lot better than a mouse or the laptop touch-pad! Finally, I had a topology that looked more-or-less right! There were still a couple of imperfections, but no major problems as the previous two attempts!


I then saved the Photoshop file very quickly and was ready to start 3D Studio Max!


Sunday, 11 October 2009

Week 1 - Initial Thoughts

Welcome to my blog for my Virtual Environments Module, part of my 3rd year modules for my degree.

The first part of the assignment for this module, is to create our own head in 3D Studio Max. We will do this by following a series of video tutorials showing the step-by-step process of what is involved to create this 3D image.

The second part of this assignment is working as part of a group to create a 3D model of an exhibit at the Museum of Power in Langford, Maldon. This will be an interesting part of the assignment, pulling together skills from different people and working for a real client. However, the timeframe is small like the first part, and will take a lot of time and effort to complete by the end of the semester.

3D Modelling is not one of my strong areas, so personally I feel I may find this module quite challenging. Although there are video tutorials to follow for the first part, there is still a lot of work involved to complete the first part of the assignment by the end of Week 5 and the second part by Week 12. Therefore, I plan to try to keep on top of the workload to ensure I have plenty of time to get as far as I can with my own model of my head.

I will post my progress of this assignment on this blog in steps as I complete them.